
General
The LiveDesign Connector is a Spotfire panel developed to increase the integration of LiveDesign and Spotfire from Spotfire Analyst and Web Player. Using the LiveDesign Connector, you can, among other features, import LiveReport data into Spotfire and create Spotfire templates designed for the LiveDesign Gadget.
To use the LiveDesign Connector, it is always required to open the panel and login to LiveDesign.
Open the panel
- Launch your Spotfire client (Analyst or Web Player)
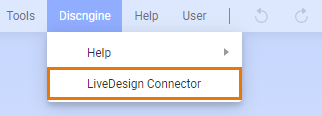
- Click on the menu Discngine > LiveDesign Connector
Login to LiveDesign
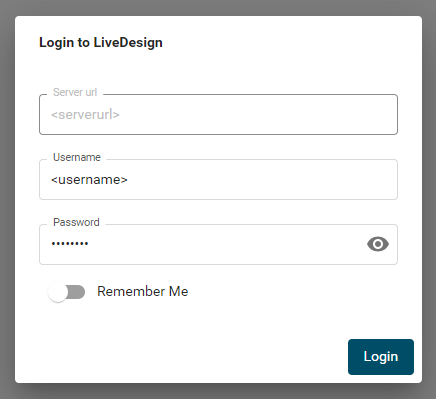
If you are not already connected to LiveDesign, you will need to login in the automatically opened window to use the panel.
You can login either with credentials or with SSO (Single Sign-On) if it is activated on LiveDesign side.
With credentials
- Enter your LiveDesign credentials in the opened window
- Check "Remember me" to avoid this step next time (optional)
- Click on Login
With SSO
-
Click on Login With SSO
- This button is disabled if the SSO is not activated for your LiveDesign server
- If you already logged in with SSO and your session is still valid, this will open a pop-up which will be closed automatically after few seconds and all the steps below will be skipped
- If not, this will open a pop-up with the LiveDesign authentication page
-
Click on Log In with Single Sign-On (SSO)
- This will open your company authentication page
- Authenticate as usual
- This will open the LiveDesign project page in the pop-up
- This behavior is due to a limitation of the LiveDesign API and should be fixed soon
-
Close the pop-up containing the project page
- The opened window in the panel will be updated
-
Click on I've Already Logged In On LiveDesign
- This will open a pop-up which will be closed automatically after few seconds

Import LiveReport
- Click on Import
- This button is available from the LiveDesign Connector home page in the Import LiveReport card
- This will open the import page
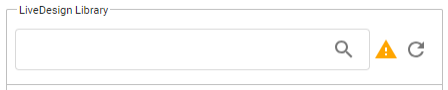
On the first load, the interface will load the complete LiveDesign library, which can take a while, depending on the number of projects and LiveReports you have.
For next load, it will be loaded from a local cache to be faster. If the cache is older than 7 days, you will get a warning that recommend you to refresh the cache using the refresh button.
-
Select the LiveReport to import
- To find it you can filter the LiveReports based on the name or id, or you can browse the complete LiveDesign tree
- When your mouse is over a LiveReport name, additional information is provided, such as author or id
- Once selected, click on Next
-
Set the import options
- Set the name of the import data table
- For now this name must be "LiveReport Data" or the name defined in the DefaultExportDataTableName preference to be used in the gadget
- Select the structure column(s) you want to generate
- Choose if you want to import the LiveReport in the current document or in a template related to the selected LiveReport
- Choose if you want to automatically add a table plot in the current Spotfire page after the import
- This option is only available when the import is done in the current document
- Set the name of the import data table
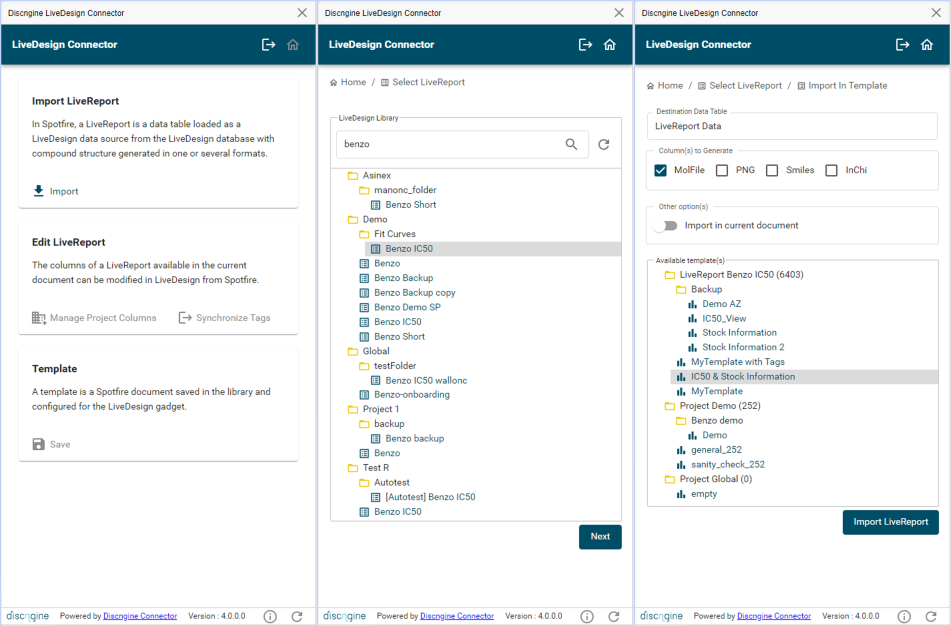
- Click on Import LiveReport
- The import process steps will be displayed
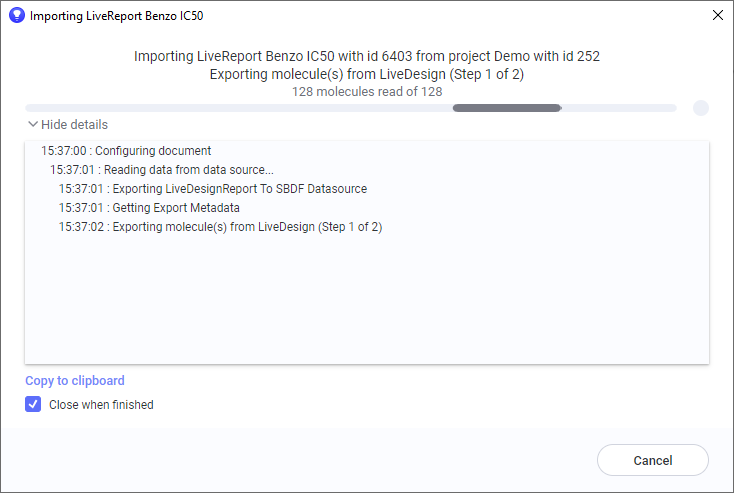
- Once the import is done, you can check the status in the Spotfire notifications

Explanation:
When importing a LiveReport as a data table into Spotfire, the data source LiveDesign DataSource by Discngine is used. In addition some metadata are stored in the data table properties and will be used when saving the document as template, including project ID and name, LiveReport ID and name, structure formats and origin.
Edit LiveReport settings
After importing one or several LiveReports as data tables in a Spotfire template, you can manage these data tables and their import settings.
-
Click on the name of the data table preceded by the icon
- This button is available from the LiveDesign Connector home page in the Import LiveReport card, directly visible or available from the Others button
- This will open the edit data table page, with prefilled values by the current settings
-
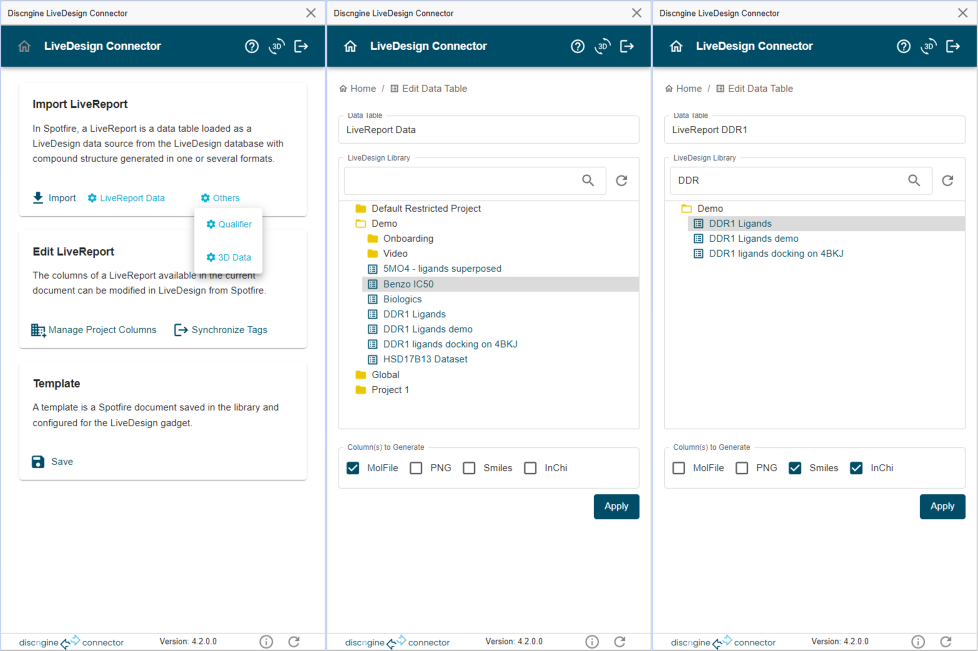
Edit one or several settings
- Rename the data table
- Change the LiveReport imported in the data table
- Change the structure columns generated
-
Click on Apply
- The settings of the data table will be changed.
- If the LiveReport or the structure columns have been changed, the LiveReport will be imported again
Save as template
After editing a document having a LiveReport imported into the standard data table ("LiveReport Data" or name defined in the DefaultExportDataTableName preference), you can save the document as a template.
Save as new template
When designing a template from scratch you will need to save it as a new template. It is also possible to start from an existing template and to create a new one based on it.
-
Click on Save As
- This button is available from the LiveDesign Connector home page in the Template card
- This will open the save new template page, with prefilled name and description if you are already in an existing template
-
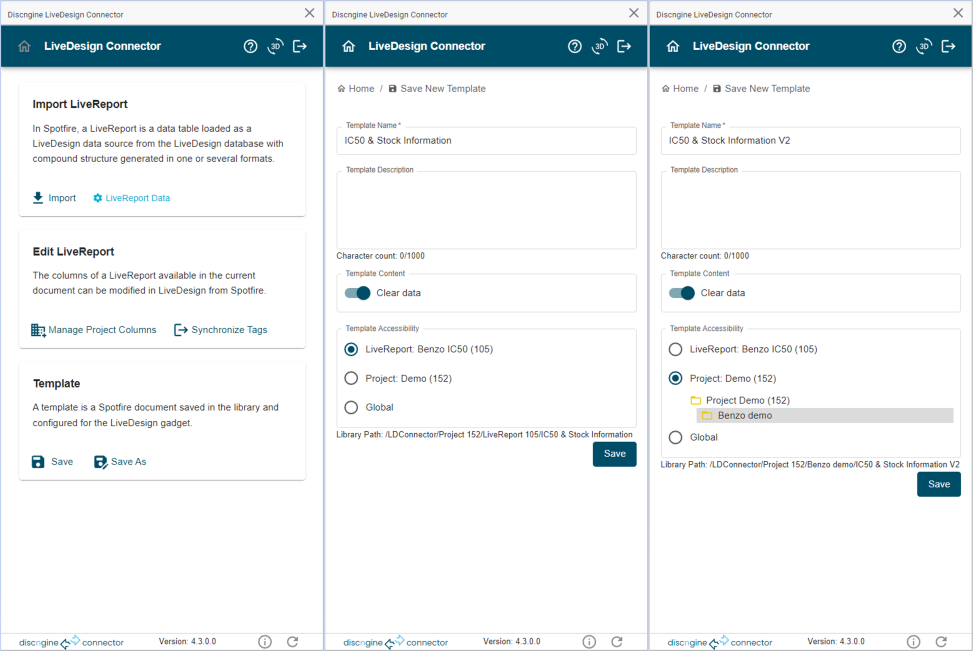
Set the template name and location
- Set the name of the template
- Set the description of the template
- Define if the imported LiveReports should be emptied
- Choose the accessibility level of the template
- The associated project and LiveReport are reminded next to the accessibility levels
- If LiveReport, the template will be saved under <DefaultLibraryPath>/Project <Project ID>/LiveReport <Livereport ID>
- If Project, the template will be saved under <DefaultLibraryPath>/Project <Project ID>
- If Global, the template will be saved under <DefaultLibraryPath>/Project 0
- The final library path is reminded below
- See Library Structure Convention for more details
-
Click on Save
- The document is saved at the indicated location, and the data table is configured to be in "Stored Data" mode
You can now use the template from the Spotfire Connector Gadget.
Explanation:
Saving a Spotfire document as a template for the gadget implies extra-steps compared to the simple save functionality. The first step is to use the appropriate path in the Spotfire library to have the chosen accessibility of the template from the gadget in LiveDesign. If the accessibility of a template is set to LiveReport, then this template will be available in LiveDesign only from the associated LiveReport. If it is set to Project, then it will be available from all LiveReports of the associated project. Finally if it is set to Global, it will be available from all LiveReports. The second step is to set the data loading to “Stored data” in order to avoid having to reconnect to LiveDesign each time the analysis is opened, either in Spotfire or LiveDesign environments. Due to this, a third optional step is to empty the content of the data table to hide the data to non-authorized Spotfire users. The last step is to close the panel before saving (and open it back after) in order to not have the panel displayed by default when opening a template in the gadget.
Save in current template
After editing an existing template, you can save it at the same location. The current template will be overwritten.
-
Click on Save
- This button is available from the LiveDesign Connector home page in the Template card
- This will open the save template page, with read-only name and location
-
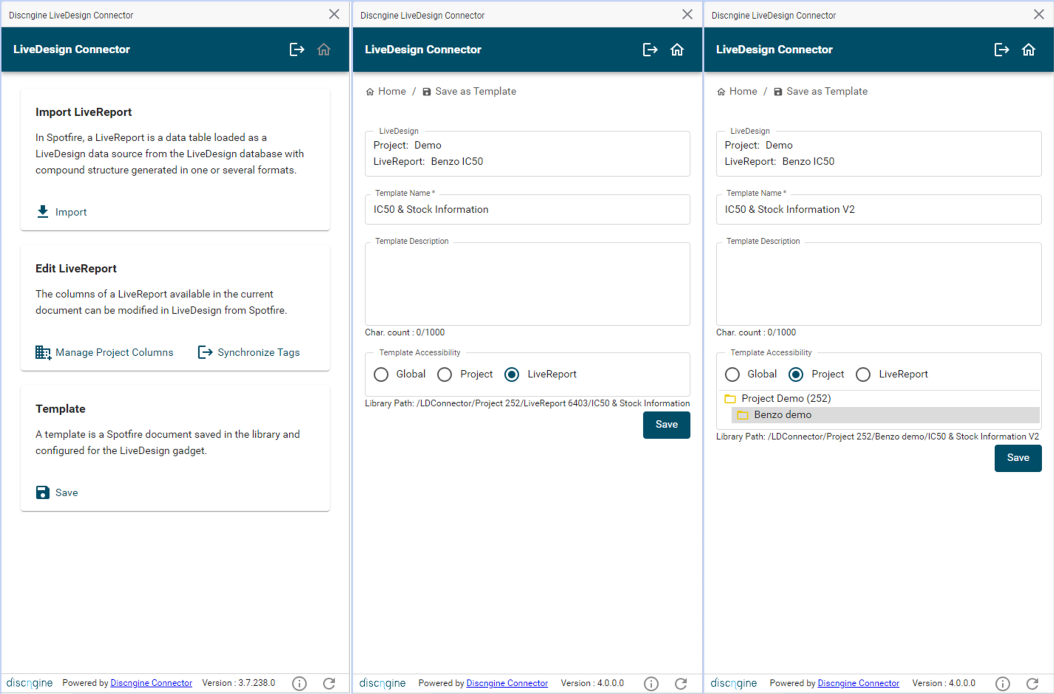
Check template information
- Check the name of the template
- Set the description of the template
- Define if the imported LiveReports should be emptied
- Check the accessibility level of the template and the location, based on the initially associated project and LiveReport
- A warning is displayed if there is a mismatch between the source of the "LiveReport Data" data table and the location of the template
-
Click on Save
- The current document is overwritten, and the data table is configured to be in "Stored Data" mode
Explanation:
The initial location of a template is defined based on the chosen accessibility level and on the source of the "LiveReport Data" data table, meaning the LiveReport imported into this data table. It is possible, although not recommended, to replace the source of this data table by another LiveReport, even coming from another project. When doing this, and saving the current template, there might be a mismatch between the location of the template and the current source of the main data table, depending on the accessibility level. In this case (if the LiveReport changed with LiveReport accessibility, or if the project changed with Project accessibility), a warning is displayed and reminds the source of the current "LiveReport Data" data table. To not save the template with this mismatch, it is possible to save it as a new template instead.
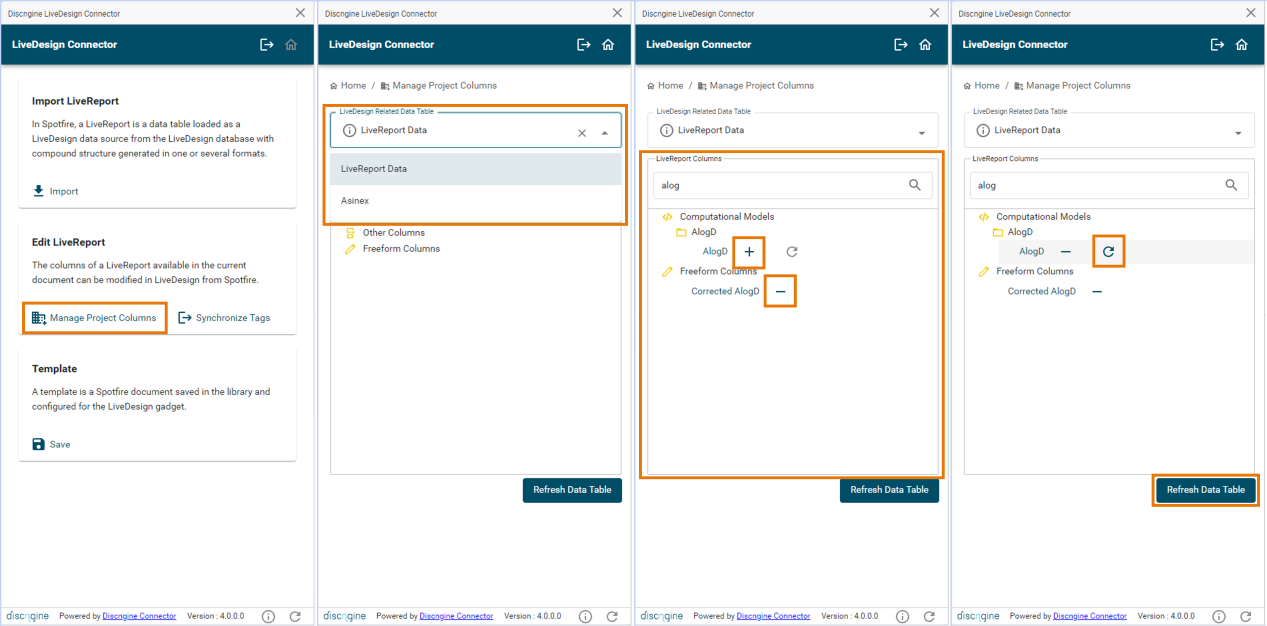
Manage project columns
After importing one or several LiveReports in a Spotfire template, you can manage the list of LiveDesign project columns available in these LiveReports.
NB : currently, only Computational Models (without parameters), Database (Other) Columns and Freeform Columns are managed.
-
Click on Manage project columns
- This button is available from the LiveDesign Connector home page in the Edit LiveReport card
- This will open the Manage Project Columns page
-
Select the data table for which manage project columns
- This data table must have been imported from a LiveReport
-
Search for the column(s) to add/remove
- You can expand/collapse the folders in the column tree view
- You can filter the columns by name in the search field
-
Add or remove a column in the associated LiveReport
- Click on the Add (+) or Remove (-) button located next to the name of the column
- A notification will be displayed when the column is added or removed successfully
A column can be present in the LiveReport but hidden. In this case, the column will not be imported in Spotfire, as only visible column are exported by the LiveDesign API.
-
(Optional) Refresh the content of a column being part of Computational Models in the associated LiveReport
- Click on the Refresh Model button located next to the column name
- This will run the corresponding model
- A notification will give the status of this run
-
Refresh the selected data table after editing the associated LiveReport by clicking on the Refresh Data Table button.
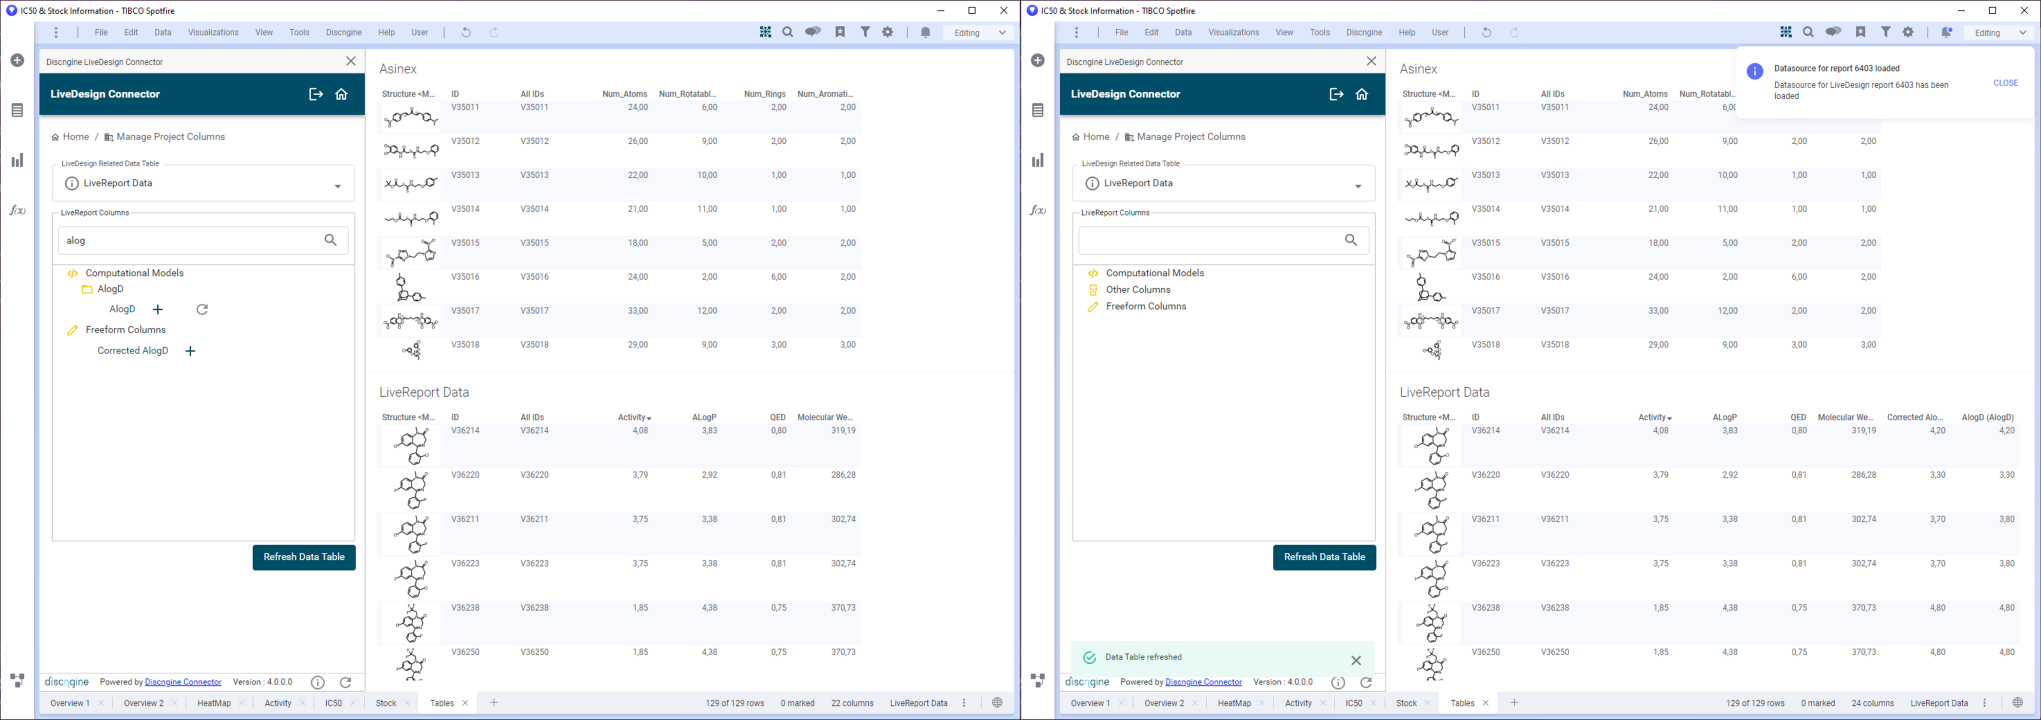
Example:
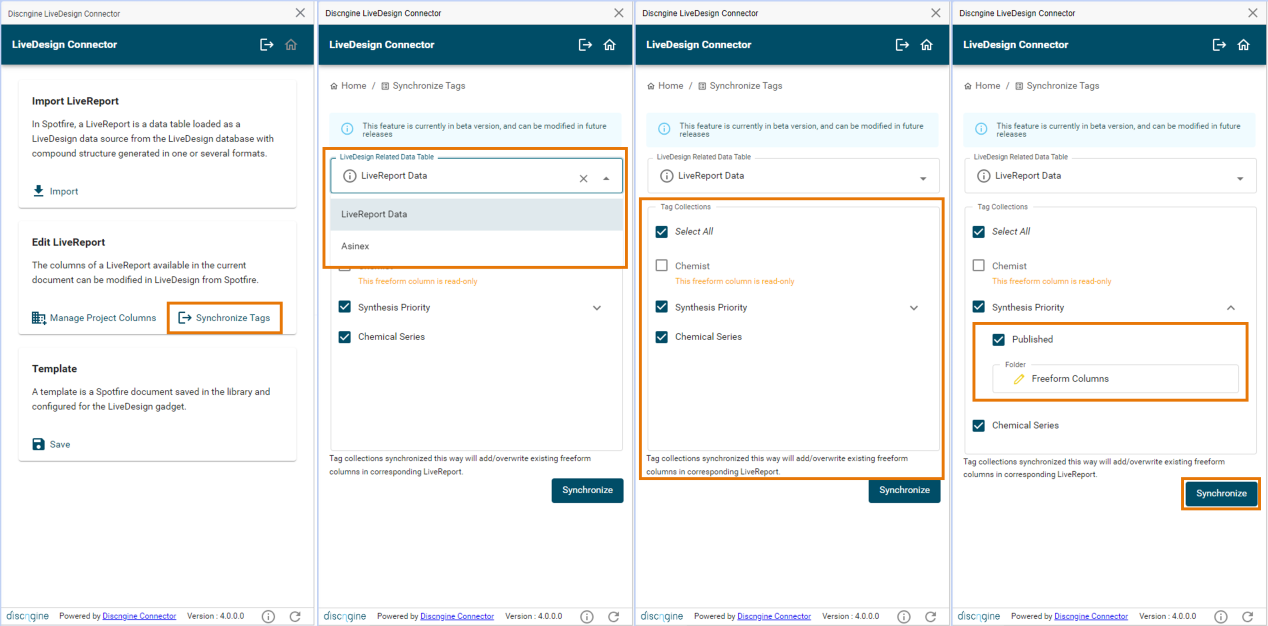
Synchronize tags
In LiveDesign, compounds can be annotated using freeform columns and in Spotfire, rows can be annotated using tags. These two functionalities can be synchronized through the Connector in order to annotate your data no matter the context.
The freeform columns that can be converted into tags are constrained, without multi-selection allowed and currently text type only.
Note that the read-only freeform columns are imported into tags but these tags cannot be pushed back to LiveDesign when they are modified in Spotfire.
The compatible freeform columns are automatically imported as tags when LiveReport data are loaded into Spotfire through the panel, at import time or when reloading. It is optional in the data source. Note that they are never deleted at import time even if there is no corresponding freeform column in the imported LiveReport, in order to avoid to break the template.
These tags can be modified, or new tags can be created (see official documentation). In order to save these modifications in LiveDesign, a user input is required.
-
Click on Synchronize Tags
- This button is available from the LiveDesign Connector home page in the Edit LiveReport card
- This will open the Synchronize Tags page
-
Select the data table from which to export tags
- This data table must have been imported from a LiveReport
-
Choose the tags to export as freeform columns
- By default all existing and new tags are exported
If you choose to not export some of the modified tags and reload the data, the modifications will be overwritten by the freeform columns coming from LiveDesign.
-
Configure new tags
- Choose whether the corresponding new freeform columns are published in the associated project or not
- If published, choose the freeform columns folder
- Choose whether the corresponding new freeform columns are published in the associated project or not
-
Click on Export
Explanation:
The ID column coming from LiveDesign is used as key column and is mandatory in order to associate values to the correct rows. Note that if this column is hidden in the LiveReport, it is temporarily displayed at import time.
When a tag is created from a freeform column, the identifier of this column is retrieved and saved in the tags column properties. This identifier is then used for the synchronization, in order to make it work even if the freeform column or tags column are renamed. When a new freeform column is created from a tags column, the newly created identifier is also retrieved from LiveDesign and applied to the tags column properties in Spotfire.
When synchronizing tags from Spotfire to LiveDesign, some warnings can be raised:
- This freeform column is read-only: The corresponding freeform column is read-only in LiveDesign. It is not possible to push the potential modified tags to LiveDesign.
- This published freeform column will be added to your LiveReport: The corresponding tag collection available in Spotfire is linked to a published freeform column which is not in the associated LiveReport. Synchronizing this tag collection will push the values and add the published freeform column to the LiveReport.
- The tags come from a freeform column that is missing from the LiveReport: The corresponding tag collection available in Spotfire is linked to a freeform column which is not available for the associated LiveReport (either a column unpublished or published in another project). Synchronizing this tag collection will create a new freeform column in the LiveReport.
If you add some transformations to the data table, the synchronization between tags and freeform columns can be broken.