
This tool allows the administrators to ensure that configuration is carried out correctly (and to troubleshoot if necessary). It will only be available on the local client of the administrators who installed it.
Prerequisites
Have the Spotfire database connection string or at least:
- Spotfire database server name
- Spotfire database name and type (SQL or Oracle)
- Spotfire server database read account and password
Install the Spotfire configuration tool
The first step is to retrieve the configuration tool provided by Spotfire and to make it available on your workstation.
- Go to Spotfire administration web portal
- Go to the Server Tools page
- Follow the instructions to get the configuration tool
- After unzipping the jar file you should have a
spotfireconfigtoolfolder
- After unzipping the jar file you should have a
- Move the
spotfireconfigtoolfolder in a proper location of your workstation (the path will be used later for configuration)

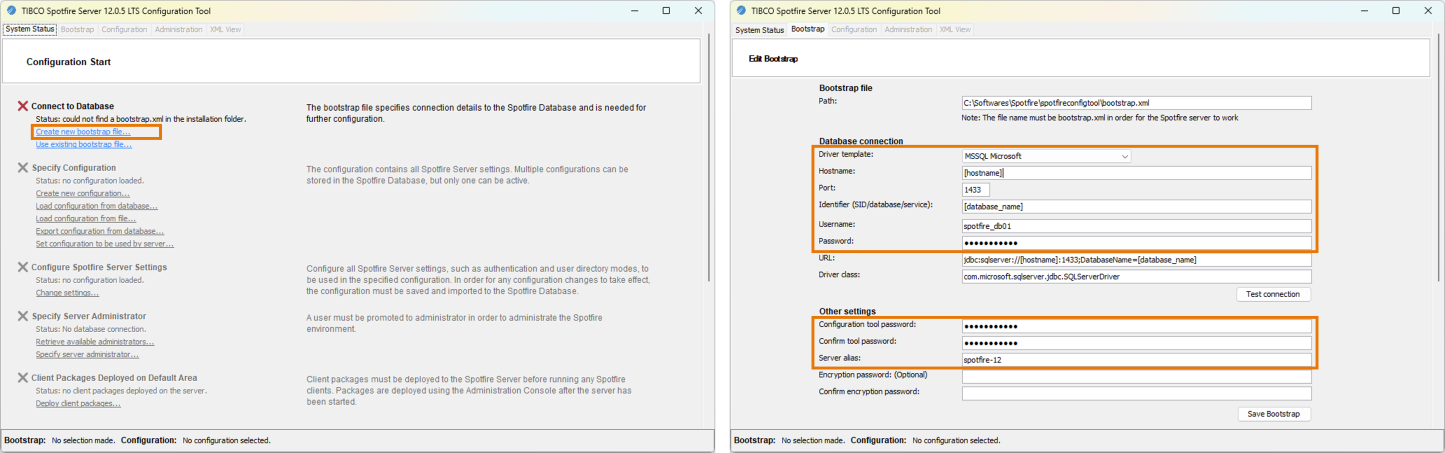
Create a bootstrap file
The second step is to configure the configuration tool provided by Spotfire by creating a bootstrap.xml file to connect to your Spotfire installation.
- In the
spotfireconfigtoolfolder, launch theuiconfig.batto open the tool (as described in the server tools instructions) - Click on "Create new bootstrap file"
- Fill the correct information in the "Bootstrap" tab:
- Check the file name
- Set the database connection
- Define the configuration tool's password
- Click on "Save Bootstrap"
- Close the window
Configure the diagnostic tool
The last step is to configure the LiveDesign Connector diagnostic tool in Spotfire by linking it with the Spotfire configuration tool and bootstrap file.
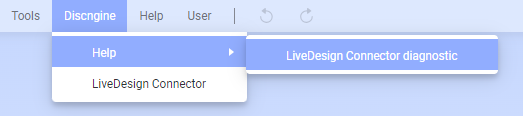
- Launch Spotfire Analyst
- Go to Discngine > Help > LiveDesign Connector diagnostic
- Double click in the "Configuration tool directory" field and select the folder where the configuration tool is located
- Double click in the "Bootstrap file" field and select the bootstrap file previously saved
- Fill the "Bootstrap file password" field with the password previously defined
- Close the diagnostic tool window and relaunch Spotfire
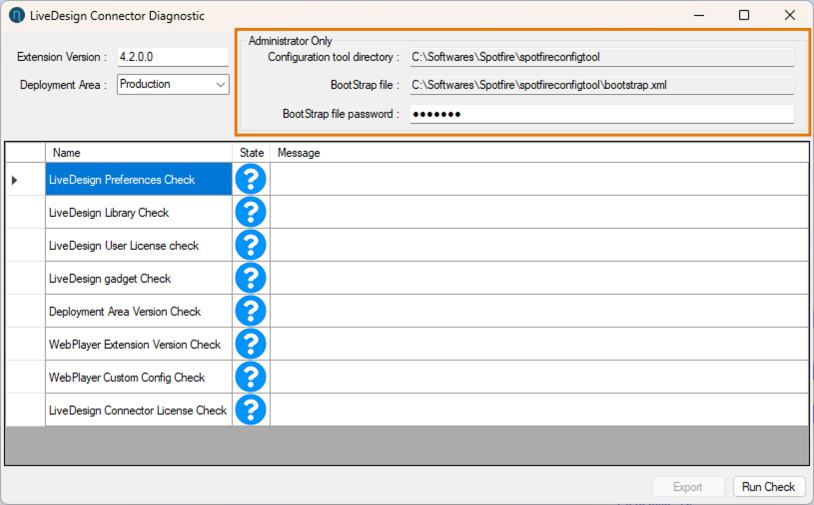
You can now use the diagnostic tool to have information if the LiveDesign Connector does not work correctly.