
The version 5.X of the Spotfire Connector for Pipeline Pilot is not supported anymore. It is highly recommended to migrate to version 6.X.
Package content
Note: the package must be unzipped in a short path location (e.g. C:\tmp).
The Discngine Spotfire® Connector package contains:
- spotfire_packages_14.6 and spotfire_packages_14.0: folders containing the SPK files for Spotfire versions 14.6 and 14.0 respectively. In each folder, you will find:
- Discngine.Connector.sdn: the distribution file that bundles together the Spotfire extensions
- All the SPK files contained in the SDN file (if you do not want to install all of our extensions, including the new Discngine Molecule Renderer extension)
- Discngine-Connector.part0.zip: a Spotfire® library export
- Discngine-Connector-Authenticator-Spotfire10.zip: the java package needed to use Pipeline Pilot as an authenticator during the Web Player connection for Spotfire 10.0+
- Discngine-Connector-js-api.zip: the JavaScript API
- Discngine-Connector-js-api-4.1.zip: the JavaScript API of the Connector 4.1 (for backward compatibility)
- Discngine-Connector-PP-collection.zip: the Pipeline Pilot collection of components and example protocols, as well as bundled SWAPP
- PoweredBy.md: a file containing the list of third-party components used and their associated license
This package is available in the download center.
Prerequisites
-
Licenses
- License keys are required to use the Connector, please contact us to get them.
-
Spotfire
- LTS version between 12.0 and 14.6
- Access to the Spotfire server web administration pages, remote access to the Spotfire server and access to the Analyst
- We strongly recommend to configure HTTPS in order to secure the communication between clients and Spotfire Server as described in official documentation
- If Spotfire server and Pipeline Pilot server are not on the same domain, please follow this knowledge base
- To use the Discngine Automation tasks, the Spotfire Automation Services must be deployed on the Spotfire server. Please refer to the official documentation.
-
Pipeline Pilot
- Version between 2020 and 2024
- Access to the Pipeline Pilot server web administration pages and remote access with administrative rights to the Pipeline Pilot server
- Chemaxon Marvin JS
- BIOVIA Draw 2016 (requires BIOVIA Draw Plugin 2016)
- Perkin Elmer Chemdraw (requires BIOVIA Draw Plugin 2016)
Spotfire
To migrate from Discngine Connector 5+ to Discngine Connector 6+, it is mandatory to follow this tutorial after installing the update.
From version 6.1+, the Discngine Connector also includes the Discngine Molecule Renderer that needs a new license key to be configured in the preferences described here. To get the license key, please contact us at support@discngine.com.
Deploy packages
In this step you will deploy the SDN file we provide in the package on your Spotfire server. We strongly advise you to use either a test server or a test area. If you prefer to use a specific area, pay attention to the routing rules associated to the user/group who will test the Discngine Connector application in the Web Player. You can find further information in the official documentation.
- Log in as an administrator on the Spotfire server web portal.
- Go to the Deployments & Packages area.
- Select the deployment area on which you want to deploy the Discngine Connector extensions.
- Click on the "Add packages" button, then choose the .sdn file from the Discngine Connector package.
- Click on "Validate area", then "Save area".
To use the Discngine Connector in the Web Player, make sure users have access to the deployment area in which you installed the Connector.
Update services
Please follow instructions from the official documentation in order to update your Spotfire Web Player services.
Import library
Discngine-Connector.part0.zip file is provided in the package. Its import will create in your library a "Discngine" folder containing several DPX files. These DXPs are required to start several of the provided tools without data at the beginning.
To import this folder:
- Copy the file Discngine-Connector.part0.zip to the Spotfire server at the following path
[Spotfire root]\tss\[Spotfire version]\tomcat\application-data\library\. - Open the Spotfire Analyst client and log in using an administrator account.
- Open Tools > Library Administration.
- Click on "Import" and "Browse" to select the file
Discngine-Connector.part0.zip. Select "Include permissions" and "Replace existing item". - Select "Library" as "Destination Folder".
We strongly recommend that you do not add your own files to the "Discngine" folder, as we may update it in future versions and you may have problems updating our files while keeping yours.
Activate license features
For each relevant group defined on your Spotfire server, check that the following license features are enabled as described in the official documentation:
- Access to Extensions
- Discngine Connector Web Panel
- Discngine Web Player Python
- Discngine Web Player Save
- Discngine Pipeline Pilot Data Functions
- Discngine Sketcher
- Discngine Renderers
Set preferences
From version 6.1+, the Spotfire Connector for Pipeline Pilot also includes the Discngine Molecule Renderer that needs a new licence key to be configured in the preferences described here. To get the licence key, please contact us at support@discngine.com.
- Launch Spotfire Analyst client and log in to the Spotfire server (use an administrator account).
- Open the Tools > Administration Manager.
- Click on the "Preferences" tab.
- For each relevant group defined on your Spotfire server, and for each Discngine Connector product you have, set the following preferences (see the official documentation to have details on the group administration).
Client Automation
The preferences for the Discngine Client Automation and SWAPP are available under DiscngineWebPanel.
If the preferences are changed, the Web Player service(s) must be restarted.
Configuration

- BaseURL: [mandatory] the target URL for the Client Automation. This is the URL that will be loaded in the Web Panel.
-
To use the SWAPP, set it to:
http(s)://[server]:[port]/discngine/swapp -
To point to the "Default Client Automation Home Page", set it to:
http(s)://[server]:[port]/protocols/Discngine/Spotfire%20Enabled%20Protocols/Client%20Automation/Default%20Client%20Automation%20Home%20Page?$redirectfile= -
To point to a custom protocol, generate a link by finding the protocol in Pipeline Pilot (for example under
Protocols/Discngine/Spotfire Enabled Protocols/Client Automation/Default Client Automation Home Pagefor "Default Client Automation Home Page"). Right click on the protocol in the explorer and select "Create Protocol Link", then select "Show File Result" and tick "Redirected", then "Copy to Clipboard".
-
- DebugMode: [optional] only for development team, keep it empty.
- LicenseKey: [mandatory] a valid license key for the Client Automation.
- PeriodBeforeExpiration: [optional] the number of days before the license expiration during which you will be notified.
- StartDocumentPath: [optional] a document stored in the library to open with the Discngine Web Panel.
- StartPageName: [optional] the default title of the page created with the Discngine Web Panel.
- TempFolder: [optional] the temporary folder used during the export process to generate intermediate files. To be used only for some special cases.
By default this preference is empty. Then the default temporary folders will be used in Analyst and Web Player. By default in Analyst, it is on the local computer of the user. By default in Web Player, it is the default temporary folder of the Web Player service account. If the value is not empty, we highly recommend to set this value to a shared network folder with read/write access for all users using the Connector and for the Spotfire Web Player service account. In that case, Spotfire administrators need to add this path in the configuration file of the Web Player service as an "AllowedFilePaths".
SWAPP

- SwappUrl: [mandatory] the URL of the SWAPP, such as
http(s)://[server]:[port]/discngine/swapp.
Data Functions
The preferences for the Discngine Pipeline Pilot Data Functions are available under DiscnginePipelinePilotDataFunction.
If the preferences are changed, the Web Player service(s) must be restarted.
Configuration

- DefaultDocumentPathOrId: the default document that the Pipeline Pilot data functions tool will open if there is no open document. This parameter can be empty, if so, it will open a provided empty document.
- DefaultLibraryPath: the default library folder to store the Pipeline Pilot Data Functions. The path uses the same rules as Windows folders (avoid special characters: : * ? “ < > |).
- LicenseKey: the license key we provided to you.
- PeriodBeforeExpiration: the number of days before the license expiration during which you will be notified.
- ServerRoot: the URL of the Pipeline Pilot server:
https://[server]:[port]/ - StoreSessionIdinDoc: specifies whether or not the Pipeline Pilot session identifier should be saved in the Spotfire document.
- UseSBDFAsSource: if you have Pipeline Pilot Data Functions that use the STDF format as source already registered, set this preference to False, otherwise set it to True.
- XMLDBRoot: the base folder on the server where the protocols are found. Usually "Protocols" but you can set it to a subfolder if you want.
DeveloperMode
Edit the Developer Mode configuration to define a unique username/password to connect to Pipeline Pilot. Users will not need to connect when executing a Pipeline Pilot data function. Use it with caution as it is not at all secure.

- DeveloperMode (T/F): when put to true this configuration will be used, otherwise it's ignored. It's false by default.
- PipelinePilotUserName: username to be used to connect to Pipeline Pilot.
- PipelinePilotUserPassword: password to be used to connect to Pipeline Pilot. It's not encrypted.
Sketcher
The preferences for the Discngine Sketcher are available under DiscngineSketcher.
If the preferences are changed, the Web Player service(s) must be restarted.
Configuration

- DefaultDocumentPathOrId: the default document that the Sketcher tool will open if there is no open document. This parameter can be empty, if so, it will open a provided empty document.
- DefaultMoleculeDocumentProperty: the default name of the document property used by the sketcher for the molecule export.
- DefaultReactionDocumentProperty: the default name of the document property used by the sketcher for the reaction export.
- LicenseKey: the license key we provided to you.
- MarvinJsUrl: the URL of the MarvinJS sketcher. It is required if "MarvinJS" is selected in the "Sketcher" preference. The minimum supported version of MarvinJS is Marvin JS 22.19.0.
- PeriodBeforeExpiration: the number of days before the license expiration during which you will be notified.
- Sketcher: select the sketcher to use (by default Ketcher is used).
Automation Services
The preferences for the Discngine Automation Services are available under DiscngineAutomation.
If the preferences are changed, the Automation Services service(s) must be restarted.
Configuration

- LicenseKey: the license key we provided to you.
Register API clients
Mashup authentication
This step is required only if you want to use the SWAPP with Spotfire 14.5+ and cross-site configuration between Spotfire and Pipeline Pilot.
From Spotfire version 12, all web mashup applications can use, and must use from version 14.5 if cross-site is used, an OAuth authentication flow. The official documentation is here.
The JavaScript mashup API uses the OAuth 2.0 protocol for authentication and authorization, with the Spotfire Server itself as authorization and authentication server. In this section, we will register a client to obtain the identifier needed in the Connector mashup applications to authenticate to Spotfire. This identifier must be communicated to a Pipeline Pilot administrator in order to fill the package-defined global property "WebPlayerAPIClientID".
-
On the computer running Spotfire Server, open a command line as an administrator and change the directory to the location of the
config.batfile (config.shon Linux). The default location is<server installation dir>/tomcat/spotfire-bin. To execute commands on a local computer rather than the server computer, refer to the official documentation. -
To register a new client, use the command register-api-client and the following parameters:
.\config register-api-client --name="Discngine Connector Client" -S"api.js-api" -Soffline --client-profile=user_agent -Gauthorization_code -Grefresh_token -Ahttps://<public application host> -Rhttps://<public application host>/discngine/swapp/oauth_endpoint.htmlThe <public application host> placeholder used in "-A" and "-R" parameters must be replaced by the allowed JavaScript origin where the web mashup will be running. Most of the time it will be the Pipeline Pilot server, check with a Pipeline Pilot administrator ("-R" parameter must be the same value than the package-defined global property "WebPlayerAPIRedirectURL"). The "--name" parameter can have a different value than the one given as an example. The other parameters must not be changed.
If needed you can list the registered OAuth2 clients using the command list-oauth2-clients. The command show-oauth2-client will allow you to see the full configuration of a client.
-
After successful completion of the command register-api-client, the Client ID will be shown. It must be communicated to the Pipeline Pilot administrator in order to fill the package-defined global properties.
The Automation Services REST API
This step is required only if you want to use the Discngine Automation tasks.
From TIBCO Spotfire® version 7.13, a REST API is available to trigger Automation Services jobs from an external application. The official documentation is here.
This API uses the OAuth 2.0 protocol for authentication and authorization, with the Spotfire Server itself as Authorization Server. In this section, we will register a client to obtain the credentials needed in the Connector components to use the REST API. These credentials must be communicated to a Pipeline Pilot administrator in order to fill the package-defined global properties "AutomationServicesClientID" and "AutomationServicesClientSecret".
-
On the computer running Spotfire Server, open a command line as an administrator and change the directory to the location of the
config.batfile (config.shon Linux). The default location is<server installation dir>/tomcat/spotfire-bin. To execute commands on a local computer rather than the server computer, refer to the official documentation. -
Export the active server configuration (the
configuration.xmlfile) by using the export-config command. Example:> .\config export-config -
To register a new client, use the command register-api-client and the following parameters:
> .\config register-api-client --name="AutomationServicesAPIClient" -S"api.rest.automation-services-job.execute" --client-profile=other -Gclient_credentialsThe "--name" parameter may have a different value than the one given as an example, but the other parameters must not be changed.
If needed, you can list the registered OAuth2 clients using the command list-oauth2-clients. The command show-oauth2-client will allow you to see the full configuration of a client. Examples:
> .\config list-oauth2-clients # Basic information on registered clients, including the <Client ID> > .\config show-oauth2-client -i <Client ID> -
After successful completion of the command register-api-client, the Client ID and the Client Secret will be shown. They must be communicated to the Pipeline Pilot administrator in order to fill the package-defined global properties.
-
After you have finished running commands, upload the modified configuration back to the Spotfire database by using the import-config command. The configuration that you import becomes the active configuration for that server or cluster. Example:
> .\config import-config --comment="what was changed" -
Restart Spotfire Server, refer to the official documentation if needed.
REST API to Upload SBDF Files to the Spotfire® Library
Available from TIBCO Spotfire® version 10.2, the Library REST API lets external applications upload Spotfire Binary Data Format (SBDF) files to the Spotfire library. The official documentation is here.
This API uses the OAuth 2.0 protocol for authentication and authorization, with the Spotfire Server itself as Authorization Server. In this section, we will register a client to obtain the credentials needed in the Connector components to use the REST API. These credentials must be communicated to a Pipeline Pilot administrator in order to fill the package-defined global properties "LibraryUploadClientID" and "LibraryUploadClientSecret".
-
On the computer running Spotfire Server, open a command line as an administrator and change the directory to the location of the
config.batfile (config.shon Linux). The default location is<server installation dir>/tomcat/spotfire-bin. To execute commands on a local computer rather than the server computer, refer to the official documentation. -
Export the active server configuration (the
configuration.xmlfile) by using the export-config command. Example:> .\config export-config -
To register a new client, use the command register-api-client and the following parameters:
> .\config register-api-client --name="LibraryUploadAPIClient" -S"api.rest.library.upload" --client-profile=other -Gclient_credentialsThe "--name" parameter may have a different value than the one given as an example, but the other parameters must not be changed.
If needed you can list the registered OAuth2 clients using the command list-oauth2-clients. The command show-oauth2-client will allow you to see the full configuration of a client. Examples:
> .\config list-oauth2-clients # Basic information on registered clients, including the <Client ID> > .\config show-oauth2-client -i <Client ID> -
After successful completion of the command register-api-client, the Client ID and the Client Secret will be shown. They must be communicated to the Pipeline Pilot administrator in order to fill the package-defined global properties.
-
After you have finished running commands, upload the modified configuration back to the Spotfire database by using the import-config command. The configuration that you import becomes the active configuration for that server or cluster. Example:
> .\config import-config --comment="what was changed" -
Restart Spotfire Server, refer to the official documentation if needed.
Make sure that the LibraryUploadAPIClient user you create has write access to the Library folders you want to upload to.
Deploy Discngine Authenticator
Explanation
With the Discngine Authenticator, end-users are authenticated using their Pipeline Pilot credentials, preserving the default authentication mechanism (NTLM, OpenID, Database, ...).
To do that, the Discngine Authenticator extends the Spotfire external authentication by checking the user ID against the Pipeline Pilot server using the Pipeline Pilot session ID.


Spotfire will get the Pipeline Pilot cookie in the browser containing the Pipeline Pilot Session ID. This cookie is generated by Pipeline Pilot, its name is the concatenation of the string 'SCISID' and the HTTP port, that is commonly 'SCISID9944'. If this session ID is correct, the Pipeline Pilot server will return the username and the domain to use on the Spotfire server.
Deployment
The Authenticator consists of a tool and a jar file. In this section, you will first copy the corresponding files to the dedicated location on Spotfire server, then configure the Spotfire external authentication.
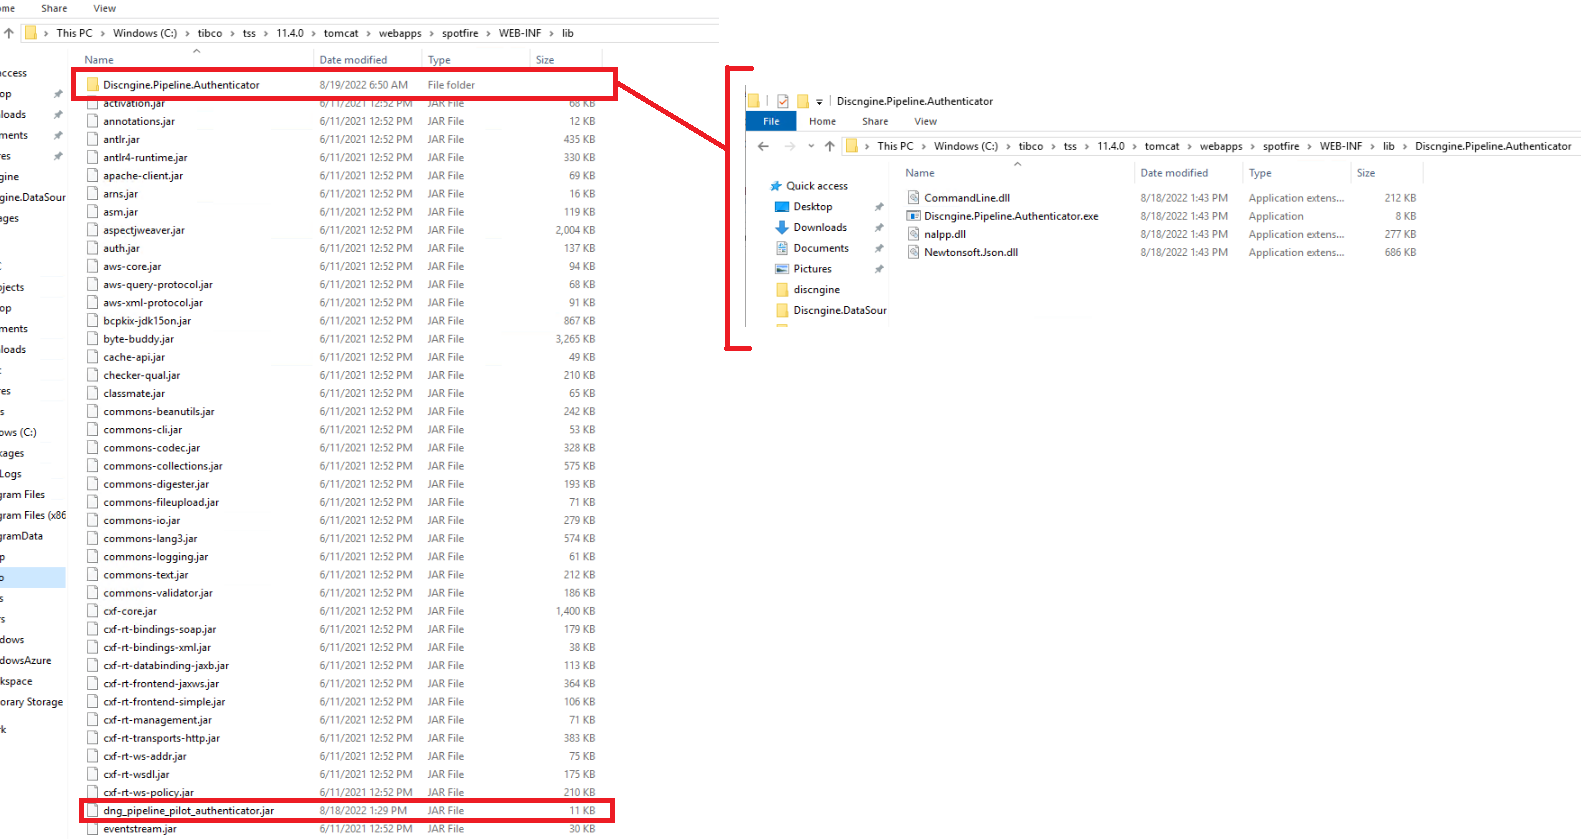
So first of all, unzip the file Discngine-Connector-Authenticator-Spotfire10.zip from the Discngine Connector package and paste the .jar file and the Discngine.Pipeline.Authenticator folder on the Spotfire server at the location [SpotfireServerDirectory]\tomcat\webapps\spotfire\WEB-INF\lib\.
Then the Spotfire authentication must be configured. On the server, follow these steps:
- Open the Spotfire Server Configuration Tool.
- In the Configuration tab, go to the External Authentication page.
- Enable the external authentication.
- Choose the type "Custom Authenticator".
- Enter "com.discngine.PipelinePilotAuthenticator" as the Authenticator class name.
- Add the "pipeline_pilot_url" parameter. The value should be the URL of the Pipeline Pilot server, using the Fully Qualified Domain Name (for instance https://myPPserver.myDomain.com:9943).
- Add the "pipeline_pilot_port" parameter. The value should be the HTTP port of the Pipeline Pilot server (commonly 9944).

Pipeline Pilot
In this section you will deploy the Connector Pipeline Pilot collection, containing:
- A set of components
- A set of protocols
- The JavaScript API
- The SWAPP
- A debug application
If Pipeline Pilot 2021 is installed on your Pipeline Pilot server, an additional configuration step may be performed. Open the Pipeline Pilot server administration page, navigate to Setup > Server Configuration in the left panel. For the "SSL/TLS Security Level" setting, choose the "Older" option and press the "Save" button.
As a prerequisite, make sure that the Job Directory Web Access setting available from the Pipeline Pilot server administration page under Security > Security Configuration > Download is set to Unrestricted.
Install collection
-
Unzip the file Discngine-Connector-PP-collection.zip from the Discngine Connector package in a short location (some protocols have long names).
-
Log in to the Pipeline Pilot server.
-
Copy the folder
tibcoconn\into the folder[scitegic_root]\apps\discngine(create the folder if this is the first Discngine collection you are installing). -
Open the command line prompt as an administrator from the Windows Start menu (Right click > Run as administrator).
-
Change the directory to
[scitegic_root]\bin(or[scitegic_root]\linux_binif you are on a Linux server). -
Install the Discngine Connector collection executing the following command:
.\pkgutil.exe -i discngine/tibcoconn -
Linux servers only - To be able to use the SWAPP, the public folder
$(sciroot)/public/Discngine/SWAPPmust be accessible for reading for all users, and for writing for every user who will need to register or update protocols in the SWAPP. When installing the package, this folder and especially the menu.json file inside are created as writable. However, this will only be effective for the group to which the user performing the installation belongs. If the user is an admin, it is very likely that other users will not be able to open the document in writing. For this reason, we recommend to set the chmod value of this folder and the menu.json file to at least 766. -
Restart the Apache Server:
- Open the Pipeline Pilot server administration page
- Navigate to Maintenance > Manage Server in the left pane
- Press the "Restart Apache" button
The "HTML TIBCO Spotfire Viewer" components and the SWAPP need some information about your Spotfire environment. You can set the values directly into the parameters of the component, or set the global properties declared for the package.
Set global properties
The global properties of the package Discngine/Discngine Spotfire Connector are available from the administration portal, under Setup > Global Properties.
| Property | Default | Description |
|---|---|---|
| WebPlayerURL | The URL of the Spotfire Web Player (e.g. https://yourspotfireserver.com/spotfire/wp). |
|
| WebPlayerAPI | The URL of the Spotfire Web Player JavaScript API (e.g. https://yourspotfireserver.com/spotfire/js-api/loader.js or https://yourspotfireserver.com/spotfire/js-api/oauth.js if the OAuth authentication is configured for mashup applications). |
|
| WebPlayerAPIClientID | Client ID for the Mashup OAuth Authentication. | |
| WebPlayerAPIRedirectURL | The redirect URL for the OAuth authentication flow (e.g. https://yourpipelinepilotserver.com/discngine/swapp/oauth_endpoint.html). |
|
| StartupDocumentPath | The Library path of the Spotfire document that will be used to open the Web Player if needed (the Web Player cannot be opened without a document - e.g. /Discngine/Client Automation/empty). |
|
| Domain | The document domain, in order to avoid browser security issues (cross-site scripting). If your Pipeline Pilot server is hosted on https://pipelinepilot.yourcompany.com:9943, set it to "yourcompany.com". | |
| SWAPPDelimiter | !!_!! |
The string delimiter used in the SWAPP. Leave it to the default value !!_!! unless your column names contain this expression. |
| SWAPPProtocolsRoot | / |
The root folder you want to see when browsing Pipeline Pilot XMLDB from the SWAPP. For example if you want to only see the example protocols for the SWAPP, specify /Spotfire Enabled Protocols/Client Automation/SWAPP Examples. |
| SWAPPHomePageProtocol | The path to the protocol used as SWAPP's home page. | |
| MarvinJSPath | Relative path to MarvinJS Editor on your Pipeline Pilot server. e.g. /marvinjs/editor.html, or /marvinjs/editorws.html if you want to use web services (see MarvinJS Documentation for details). Once set, you will be able to use MarvinJS editor in the SWAPP. |
|
| MarvinJSToolbars | When using MarvinJS, you can optionally specify which toolbars to use, e.g. reporting. See details in MarvinJS documentation. |
|
| AutomationServicesClientID | Client ID for the Automation Services REST API. | |
| AutomationServicesClientSecret | Client Secret for the Automation Services REST API. | |
| LibraryUploadClientID | Client ID for the Library Upload Service. | |
| LibraryUploadClientSecret | Client Secret for the Library Upload Service. |
Note that for WebPlayerURL and WebPlayerAPI the FQDN (Fully Qualified Domain Name) must be used to reference the Spotfire server to avoid browser security issues (cross-site scripting).
SWAPP Permissions
To allow fine control of the actions a user can perform, the SWAPP uses a system of permissions. Three different permissions exist: SWAPP_ADD, SWAPP_EDIT, SWAPP_DELETE. These permissions are set on the Pipeline Pilot end. To control these permissions, on the Pipeline Pilot Administration Portal, go to Security > Permissions. Alternatively, a group Discngine/SWAPP/Administrators is available and encompasses all above permissions. To control which users belong to this group, go to Security > Groups on the Pipeline Pilot Administration Portal.
| Permission Name | Description |
|---|---|
| SWAPP_ADD | Ability to register new protocols in the SWAPP |
| SWAPP_EDIT | Ability to edit protocols already registered in the SWAPP |
| SWAPP_DELETE | Ability to remove protocols previously registered in the SWAPP |
If you plan on using the SWAPP and modifying its menu, make sure you have the correct permissions.