This tutorial shows how to register an existing Pipeline Pilot protocol into the SWAPP.
This protocol will then be available in the SWAPP menu and you will be able to run it and get its results in Spotfire (SWAPP - Running example protocols).
Click on the icon to open the registration modal. Then click "+ Register new Protocol". You will see the tree of Pipeline Pilot protocols. The example registered protocols can be found under Discngine/TIBCO Spotfire Enabled Protocols/Client Automation/SWAPP Examples. In there the protocol "Add SMILES to Data Table" has not yet been registered, let's use it as an example. Click on the protocol name to load the parameters list. Based on the input type, the SWAPP will try to guess the most relevant input type (number, text, select, etc.).
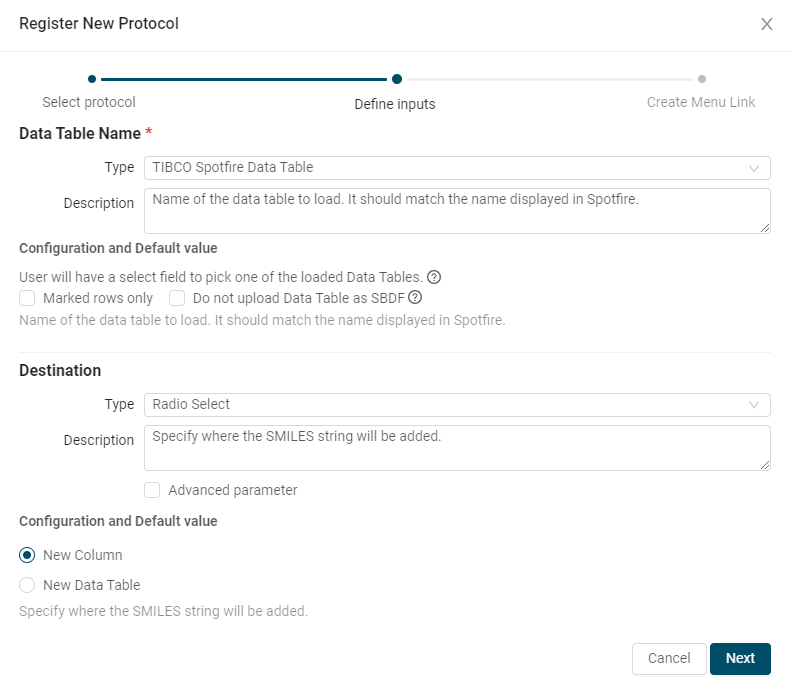
- The first parameter, Data Table Name is set by default to Type: TIBCO Spotfire Data Table. Although it is a text field in Pipeline Pilot, because it contains the words "Data Table" the SWAPP automatically suggested the correct type. Let's leave it as is.
- The second parameter Destination is set by default to a Select input type as shown in the Overview / Default value section. Switch it to Radio Select and add some description so that your users know what this parameter is for.

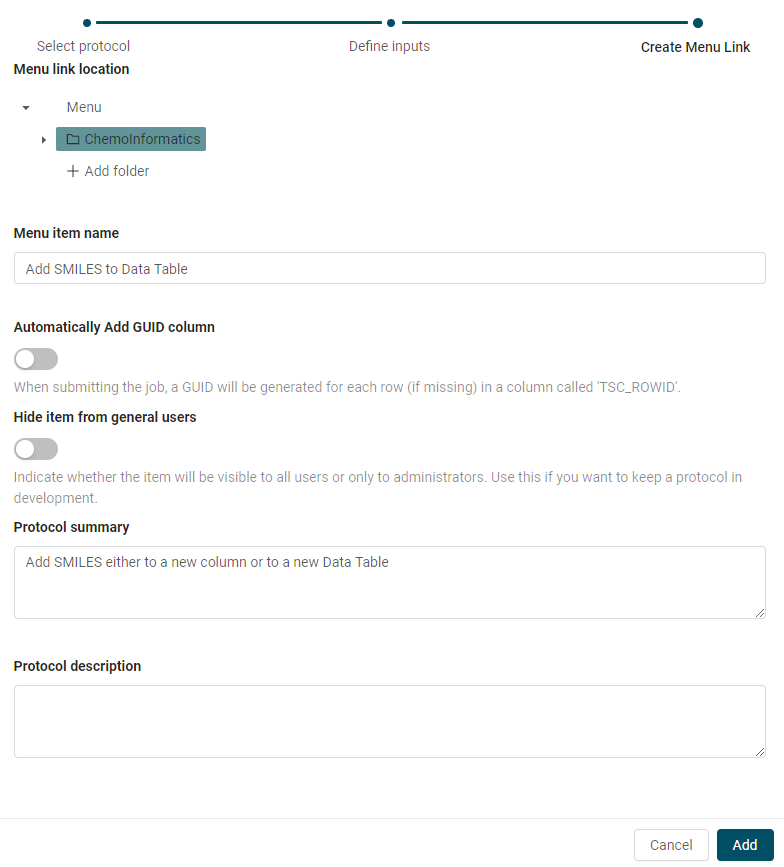
Click "Next" at the bottom of the page. We now have to select where we want the link to appear in the menu and what name we want it to appear as. For example, select ChemoInformatics under Menu, and leave the Menu item name as is. If you wish, you can write a description of that protocol, which will be displayed above the form. Finally, click Add and your protocol will be registered in the menu.

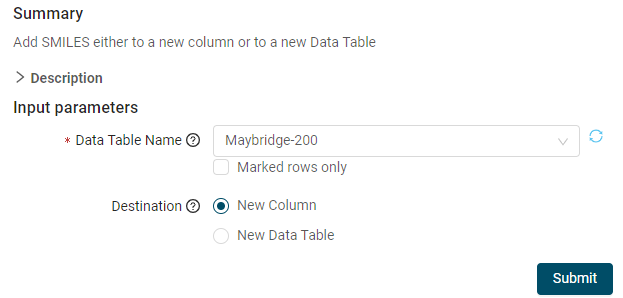
You can now load the protocol from the menu and you should see the form displayed:

