
This tutorial walks you end to end: import a peptide dataset, resolve a missing monomer, create a peptide SAR Report, and take a first look at the viewer. It ties together the individual how-to guides into one journey.
Prerequisites
- You are logged into Ideation, and the peptide plugin is enabled.
- You have a peptide file with a HELM column (CSV/Excel) or a V3000 SDF. If you use custom monomers, have a monomer library file ready (or plan to register them in the Biotoolkit Monomer Service).
Step 1: Import a peptide dataset
- On the Home page, click Create Dataset.
- Set Dataset Type to Peptide, choose a Project, and select your file.
- If your file uses custom monomers, add a Monomer Library File.
- Click Next, confirm the HELM Column and a Reference Peptide under Peptide Specific Configuration, select at least one property, and submit.
- Watch the import timeline: Initializing → Registering Monomers → Parsing Peptide Sequences → Generating Alignment → Ready.
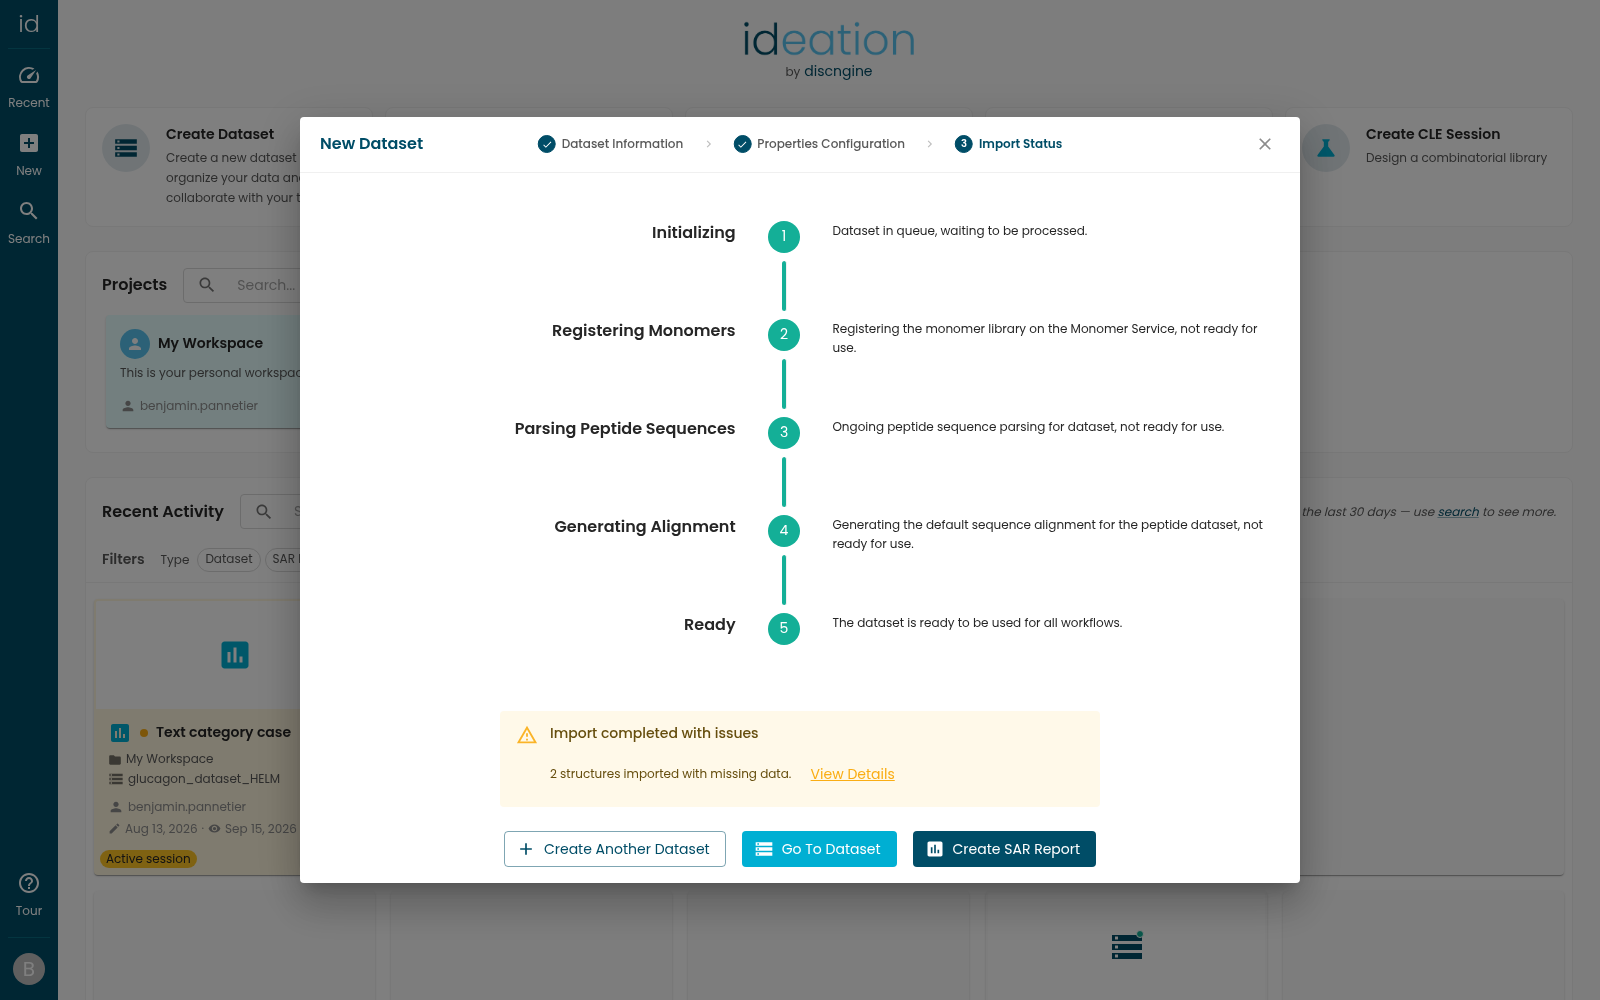
The Generating Alignment stage means your dataset already has a usable alignment when it opens — you don't need to bring one. For the full details, see How to Create a Peptide Dataset.
Step 2: Resolve any missing monomers
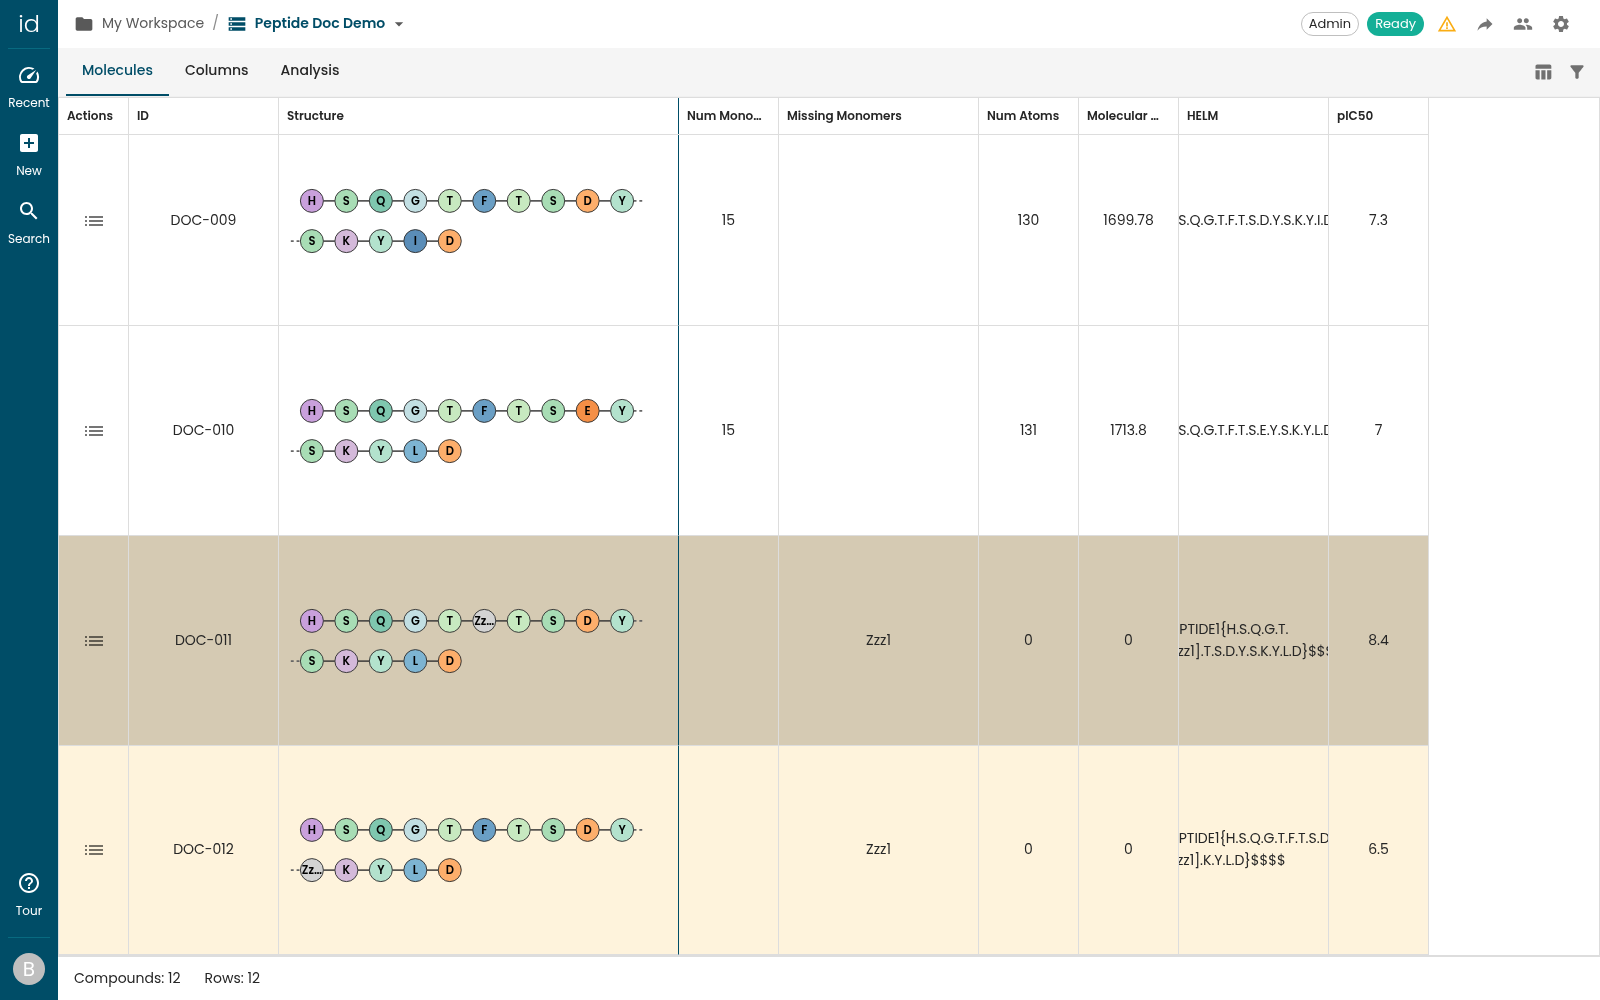
If some peptides used monomers Ideation could not resolve, the dataset opens with an amber warning triangle in the title bar ("N structures imported with missing data") and a Missing Monomers column in the grid, with the affected rows highlighted.
- Click the warning to open the import issues dialog and read why each structure is listed and what it is missing — a missing monomer is fixable here, a HELM error has to be corrected in the source file.
- If the dialog ends with a box listing monomers missing from the Biotoolkit Monomer Service, open the Biotoolkit Monomer Service App and register them.
- Back in the dialog, click Sync Monomers to recompute structures and properties.
See How to Resolve Missing Monomers for more.
Step 3: Create a SAR Report
- From Home, click Create SAR Report and pick your peptide dataset.
- Choose a Reference Peptide.
- Under Alignment, select the Default alignment that came with the import (badged AUTO). To use your own instead, click New Alignment → Import from a file.
- Click Generate SAR Slide.
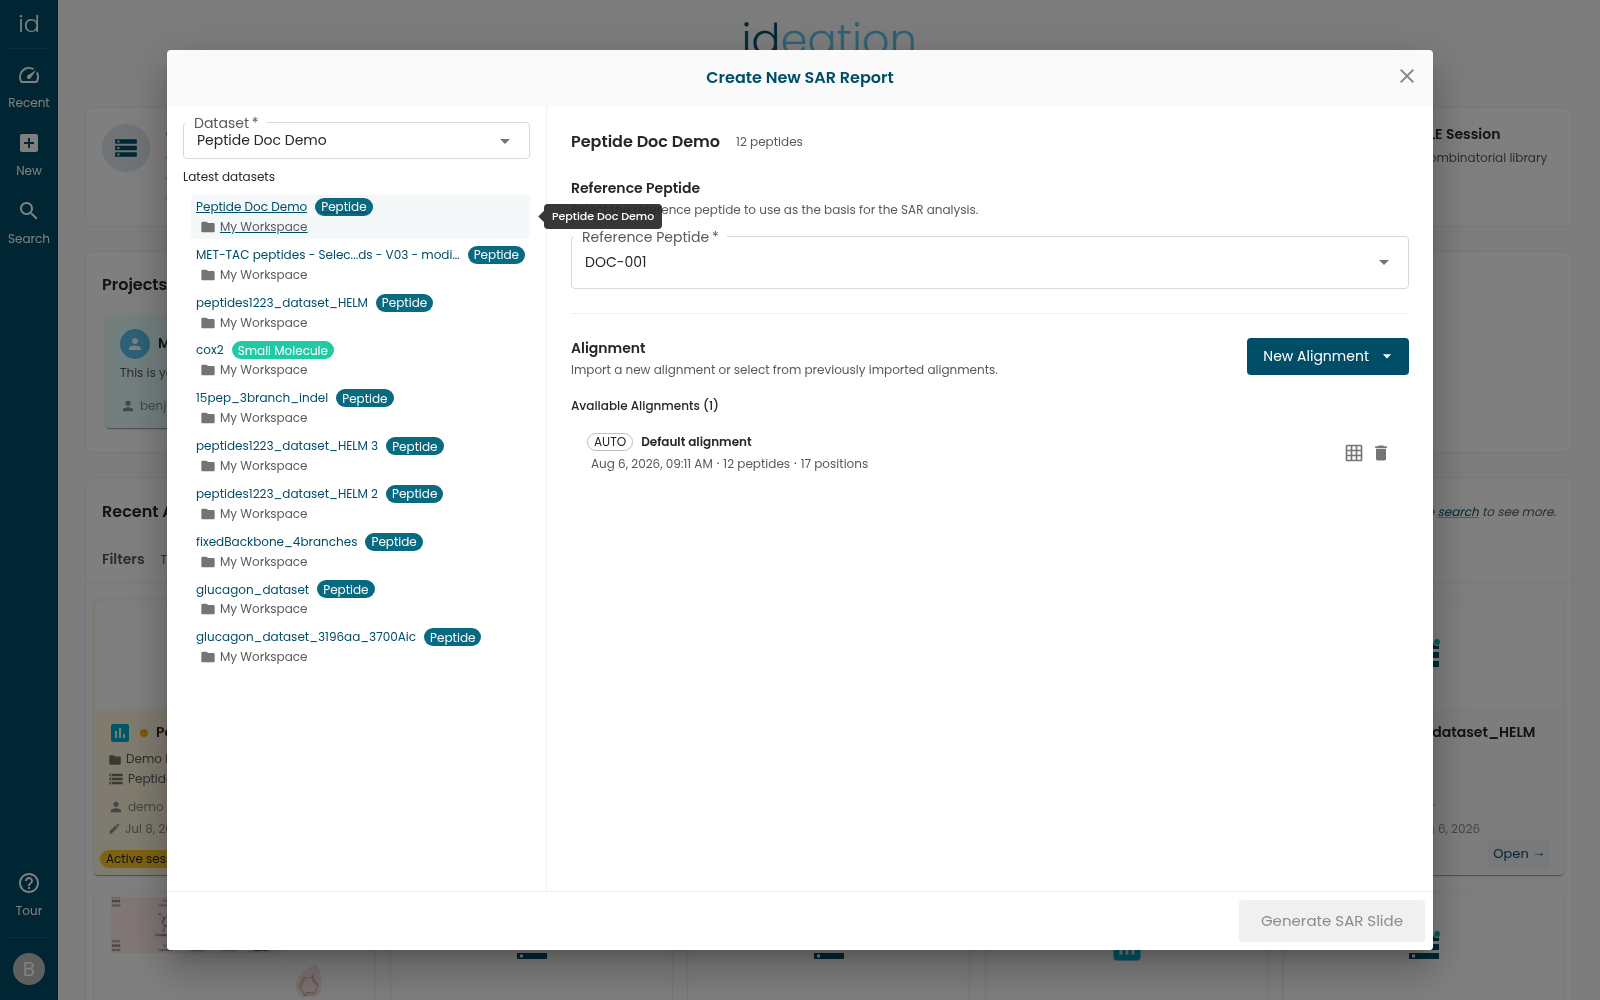
Your report opens with its first SAR Slide. You can add more slides later with Add SAR Slide. See How to Create a Peptide SAR Report and How to Align Peptides.
Step 4: Take a first look at the viewer
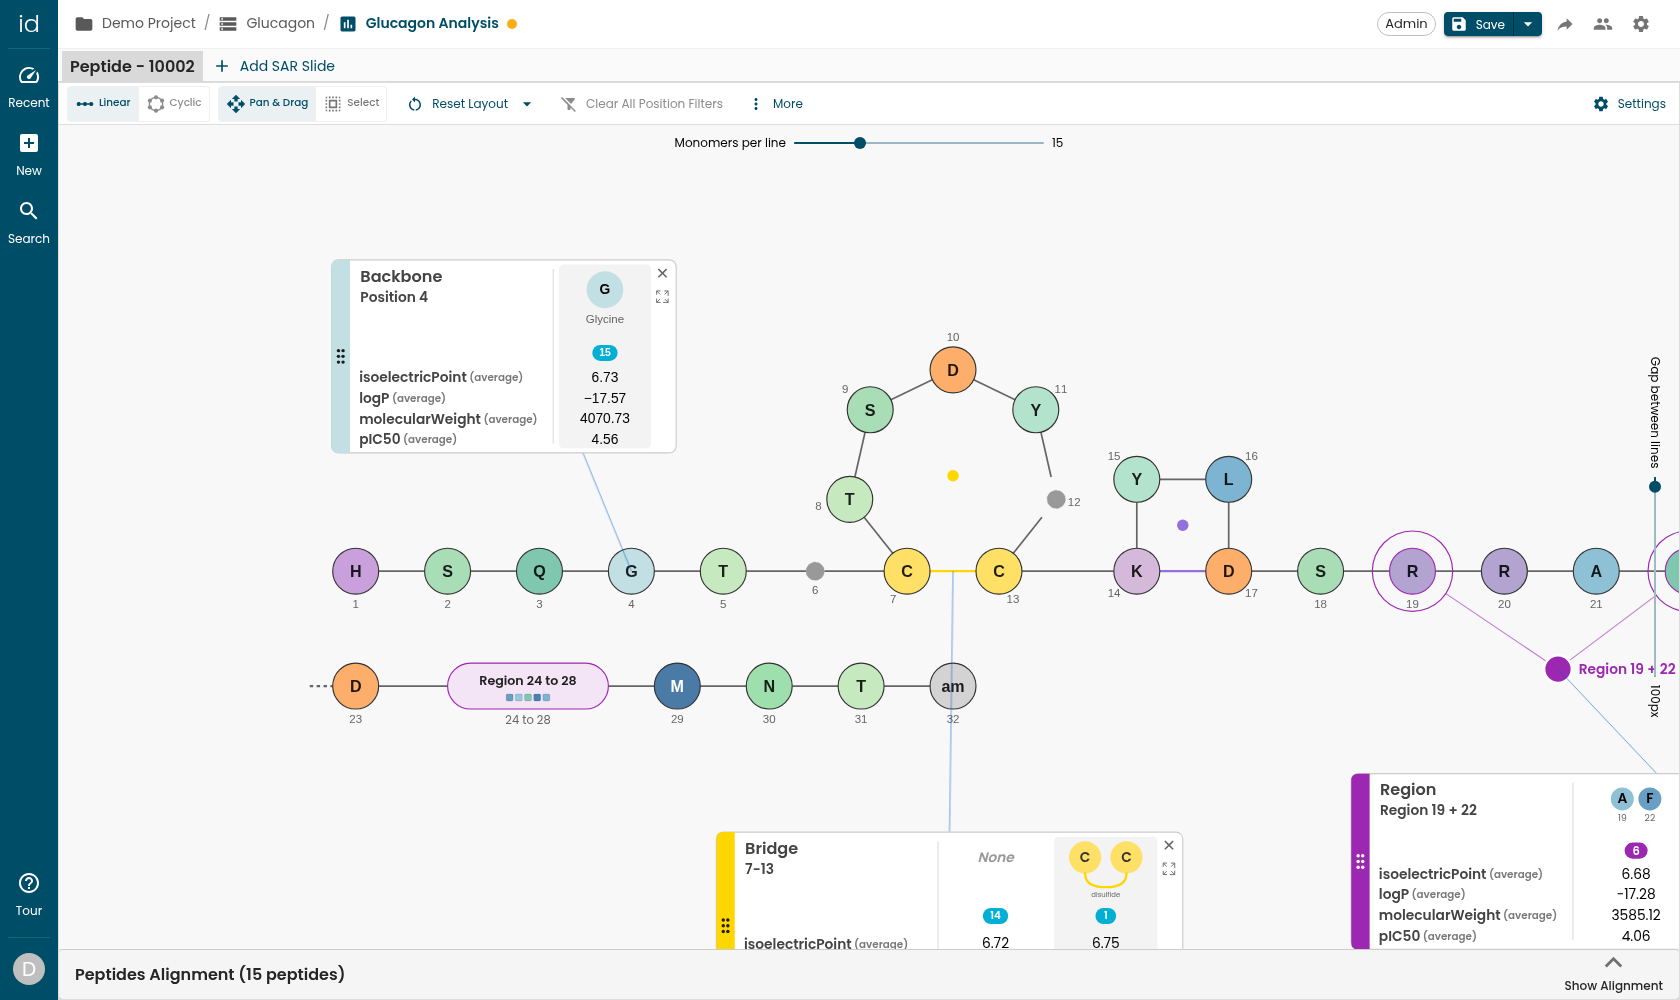
The viewer draws your reference peptide's backbone, with its bridges, branches, chemical objects, and regions. Try these first actions:
- Pan and zoom the canvas in Pan & Drag mode.
- Click a monomer to open its gallery of variants and endpoint values.
- Switch to Select mode to select a run of monomers and Create Region.
What you learned
- A peptide dataset is imported from a HELM file or SDF, with an optional monomer library; unknown monomers are registered via the Biotoolkit Monomer Service.
- Missing monomers are resolved by registering them and then syncing the dataset.
- Import also computes an alignment for you, so a dataset is ready to analyze straight away; you can still import or regenerate one at any time.
- A SAR Report holds one or more SAR Slides, each built on a reference peptide and an alignment.
- The viewer visualizes the backbone, branches, bridges, cyclization, regions, and per-position variants.